Personalized Introduction
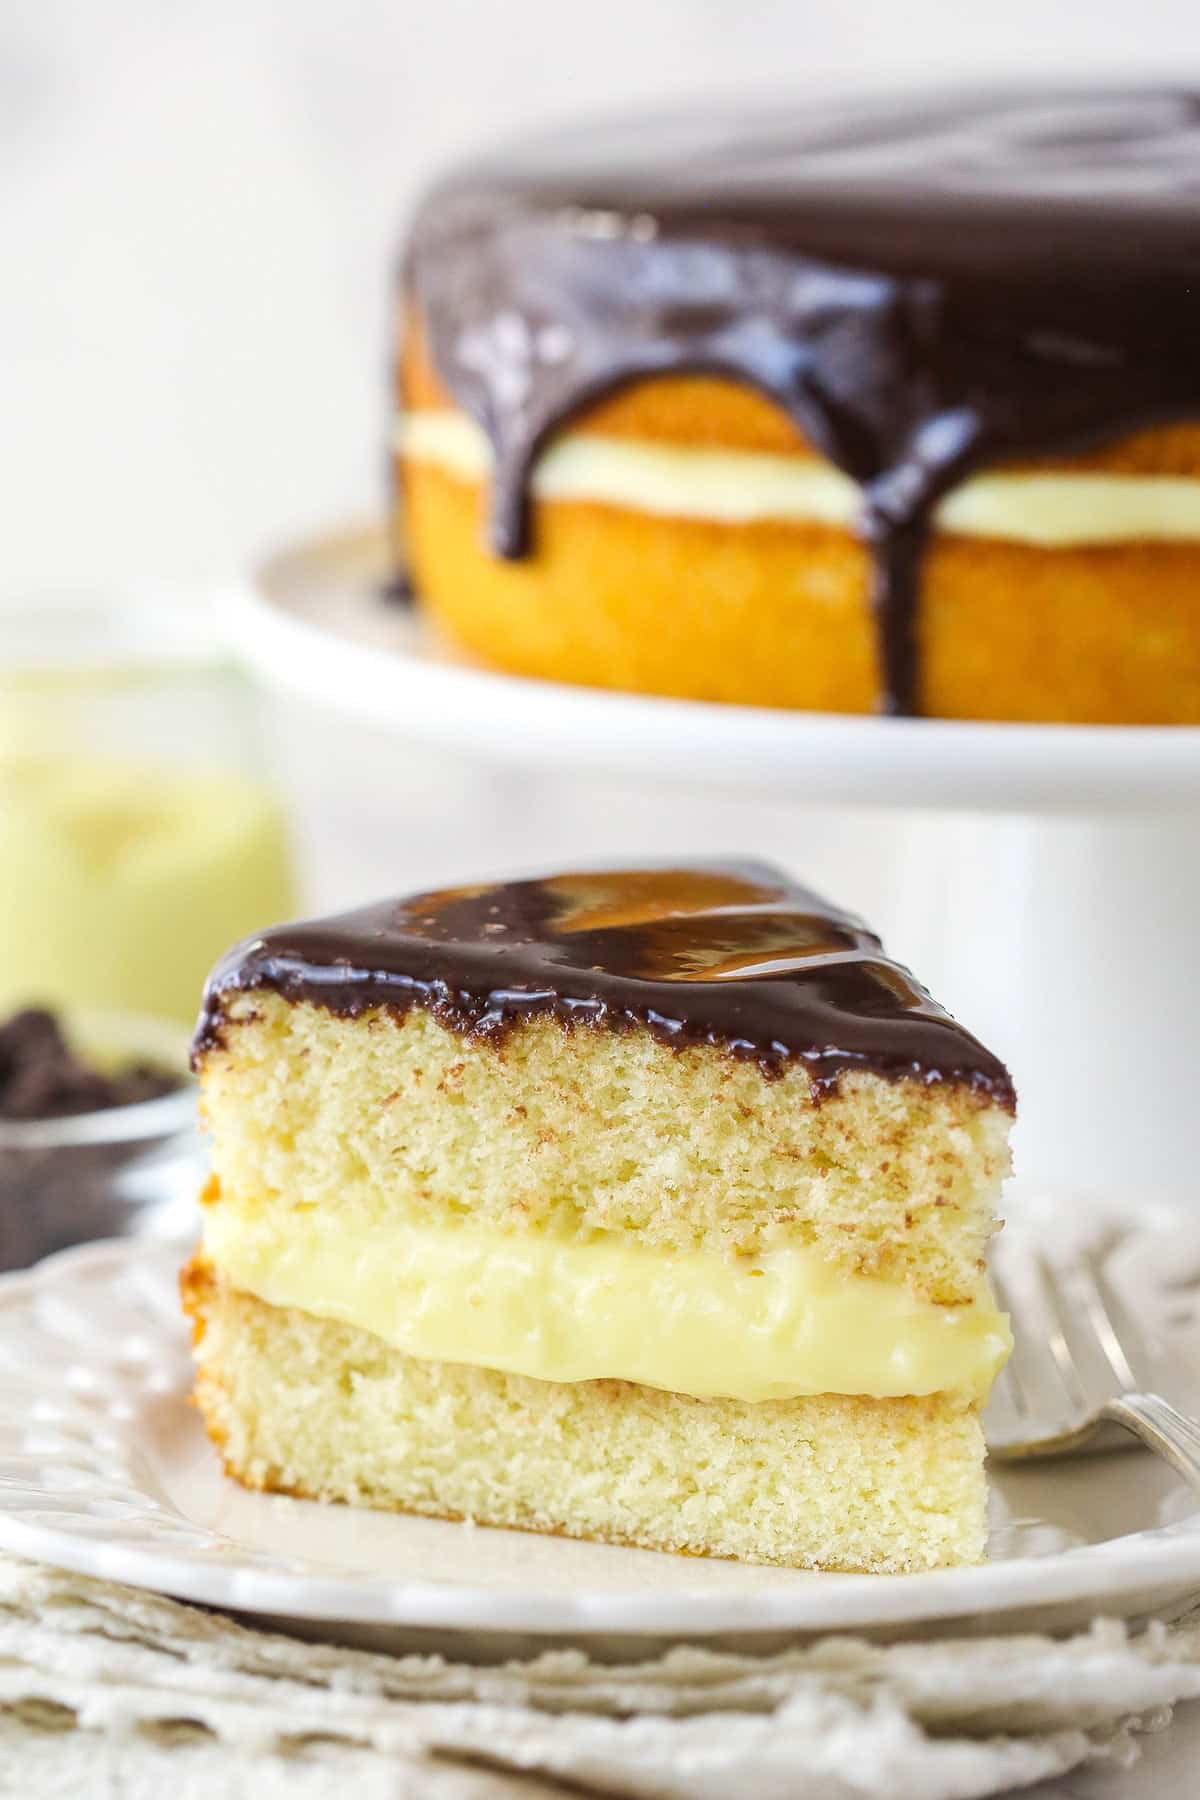
There’s something incredibly special about baking a dessert completely from scratch. The smell of vanilla cake rising in the oven, the silky pastry cream slowly thickening on the stove, and finally pouring glossy chocolate ganache over the top—it feels less like following a recipe and more like creating a little celebration in your own kitchen. That’s exactly how I feel every time I make this Homemade Boston Cream Pie.
Despite its name, Boston Cream Pie isn’t actually a pie at all. It’s a beautiful layer cake filled with rich vanilla pastry cream and topped with smooth chocolate ganache. The combination may sound fancy, but once you break it down into simple steps, it’s surprisingly approachable for home bakers of all skill levels.
I remember the first time I attempted this dessert. I was honestly intimidated because pastry cream sounded like something only professional bakers could make. I worried about lumps, curdling, and whether the cake layers would stay together. To my surprise, everything came together beautifully. The first slice revealed that gorgeous layer of creamy filling between two soft vanilla cakes, and I couldn’t stop smiling. From that day on, Boston Cream Pie earned a permanent place in my dessert collection.
What I love most about this recipe is that it feels elegant enough for birthdays and holidays but simple enough to bake on an ordinary weekend just because you’re craving something homemade. Every bite offers tender vanilla cake, creamy custard, and rich chocolate, creating a dessert that’s perfectly balanced without being overly sweet.
Today I’m sharing every tip I’ve learned over the years so you can bake this classic dessert with confidence. I’ll walk you through each step, explain why certain techniques matter, and help you avoid the small mistakes that can make baking feel frustrating. Grab your mixing bowls, and let’s bake together.
Recipe Origin & Story
Boston Cream Pie has a fascinating history that dates back to the mid-1800s. Although it’s called a pie, it was originally baked as a cake because cake pans were less common than pie tins at the time. The dessert was first made famous at the Parker House Hotel in Boston, Massachusetts, where pastry chefs created a delicate sponge cake filled with vanilla custard and finished with a glossy chocolate topping.
Over the years, the recipe spread across America and eventually became the official dessert of the state of Massachusetts. Home bakers embraced the recipe because it looked elegant while relying on simple pantry ingredients that were easy to find.
In my family, Boston Cream Pie became our celebration cake. Birthdays, graduations, Mother’s Day, and holiday dinners often ended with this beautiful dessert sitting proudly in the center of the table. I can still remember waiting impatiently while the cake chilled, knowing that cutting into it too early would cause the pastry cream to ooze out. Those extra minutes of patience always paid off when we finally sliced into it and admired the perfect creamy layer inside.
Even today, every time I prepare this recipe, it reminds me that some desserts never go out of style. They become traditions that are passed from one kitchen to another, carrying memories along with every delicious bite.
Ingredient Spotlight
- Main Star: The homemade vanilla pastry cream is what truly sets Boston Cream Pie apart. It’s silky, rich, and loaded with real vanilla flavor that perfectly complements the soft cake.
- Secret Boost: A small amount of butter stirred into the pastry cream at the end creates an incredibly smooth texture, while a splash of pure vanilla extract enhances every layer of flavor.
- Quality Tips: Use fresh eggs, whole milk, real butter, and pure vanilla extract whenever possible. High-quality semi-sweet chocolate makes the ganache smoother and richer, while fresh baking powder helps produce light, fluffy cake layers.
Nutritional Benefits
While Boston Cream Pie is certainly an indulgent dessert, some of its ingredients also contribute valuable nutrients when enjoyed in moderation.
Eggs provide high-quality protein and several essential vitamins, helping give the cake and pastry cream their rich texture. Milk contributes calcium and vitamin D, supporting healthy bones while creating the smooth, creamy custard filling.
Dark or semi-sweet chocolate contains antioxidants that naturally occur in cocoa. Choosing chocolate with a higher cocoa percentage adds deeper flavor while slightly reducing overall sweetness.
Like most desserts, Boston Cream Pie is best enjoyed as part of a balanced lifestyle. Sharing it with family and friends makes every slice even more enjoyable.
Adaptable Variations
- Dietary Swaps: Use gluten-free all-purpose flour for a gluten-free version. Dairy-free milk, vegan butter, and dairy-free chocolate can be substituted if needed, although the texture of the pastry cream may vary slightly.
- Flavor Twists: Add orange zest to the cake batter, espresso powder to the chocolate ganache, almond extract to the pastry cream, or fresh raspberries between the layers for extra freshness.
- Seasonal Spins: Decorate with strawberries in spring, fresh berries during summer, caramel drizzle in autumn, or festive chocolate curls during the holiday season.
Cooking Science Explained
Understanding a little baking science makes this recipe much less intimidating.
When making pastry cream, constantly whisking while heating prevents the egg yolks from scrambling. The cornstarch thickens the mixture as it reaches the proper temperature, creating a silky custard instead of a runny filling.
For the cake, avoid overmixing once the flour is added. Excess mixing develops gluten, which can make cakes tougher instead of soft and tender.
Finally, warm cream poured over chopped chocolate creates a smooth ganache because the heat gently melts the cocoa butter inside the chocolate. Stirring slowly from the center outward creates an incredibly glossy finish.
These simple techniques may sound professional, but they’re easy to master with a little patience.
Easy, Step-by-Step Recipe
Ingredients
- For the Cake:
- 2 cups (250 g) all-purpose flour
- 2 teaspoons baking powder
- ½ teaspoon salt
- ½ cup (115 g) unsalted butter, softened
- 1½ cups (300 g) granulated sugar
- 3 large eggs
- 2 teaspoons pure vanilla extract
- 1 cup whole milk
- For the Pastry Cream:
- 2 cups whole milk
- ½ cup granulated sugar
- 4 egg yolks
- ¼ cup cornstarch
- 2 tablespoons unsalted butter
- 2 teaspoons vanilla extract
- For the Chocolate Ganache:
- 6 ounces (170 g) semi-sweet chocolate, chopped
- ¾ cup heavy cream
- 1 tablespoon butter (optional for extra shine)
Instructions
- Preheat your oven to 350°F (175°C). Grease and line two 9-inch round cake pans.
- Whisk together the flour, baking powder, and salt.
- Beat the butter and sugar until light and fluffy.
- Add the eggs one at a time, mixing well after each addition.
- Mix in the vanilla extract.
- Alternate adding the dry ingredients and milk until a smooth batter forms.
- Divide the batter evenly between the prepared pans.
- Bake for 25–30 minutes or until a toothpick inserted into the center comes out clean.
- Cool the cakes completely on wire racks.
- Meanwhile, prepare the pastry cream by heating the milk until steaming but not boiling.
- Whisk together the egg yolks, sugar, and cornstarch.
- Slowly pour the warm milk into the egg mixture while whisking continuously.
- Return everything to the saucepan and cook until thickened.
- Remove from the heat and stir in butter and vanilla.
- Cover the surface directly with plastic wrap and chill completely.
- Prepare the ganache by pouring hot cream over the chopped chocolate.
- Allow it to sit for two minutes before stirring until smooth.
- Place one cake layer onto a serving plate.
- Spread the chilled pastry cream evenly over the cake.
- Top with the second cake layer.
- Pour the chocolate ganache over the top, allowing it to drip naturally down the sides.
- Refrigerate for at least one hour before slicing.
Practical & Valuable Tips
- Storage: Keep the cake refrigerated in an airtight cake container for up to four days.
- Serving Ideas: Serve with fresh berries, whipped cream, or a scoop of vanilla ice cream.
- Substitutions: Vanilla bean paste can replace vanilla extract for an even richer flavor. Bittersweet chocolate may be used instead of semi-sweet for a deeper chocolate taste.
- Cooling Matters: Never assemble the cake while it’s still warm, or the pastry cream may become too soft.
- Clean Slices: Dip a sharp knife into hot water and wipe it clean between slices for beautiful presentation.
Make-Ahead & Batch-Cooking
Boston Cream Pie is actually an excellent make-ahead dessert because several components can be prepared in advance. The cake layers may be baked a day ahead, wrapped tightly in plastic wrap, and stored at room temperature. The pastry cream can also be made the day before and chilled overnight, allowing it to fully set before assembly.
On serving day, all that’s left is preparing the ganache and assembling the dessert. This makes the recipe much less stressful, especially if you’re baking for birthdays, holidays, or special celebrations.
The fully assembled cake also benefits from resting in the refrigerator for several hours. During that time, the pastry cream firms up, the cake absorbs a little moisture, and the flavors blend beautifully.
Although freezing the assembled cake isn’t recommended because of the custard filling, the unfrosted cake layers freeze well for up to two months when wrapped properly.
Eco-Friendly Kitchen Hacks
- Save leftover egg whites for homemade meringues or omelets.
- Use reusable piping bags instead of disposable plastic ones.
- Store leftover cake in reusable glass containers.
- Measure ingredients carefully to reduce food waste.
- Turn off the oven a few minutes before baking finishes to use the remaining heat efficiently.
Pairing Suggestions
- Beverages: Fresh coffee, cappuccino, espresso, black tea, chai tea, hot chocolate, or cold milk all pair wonderfully with the creamy vanilla and rich chocolate flavors.
- Sides & Sauces: Fresh strawberries, raspberries, blueberries, whipped cream, vanilla bean ice cream, or a light berry compote create beautiful accompaniments without overpowering the cake.
Frequently Asked Questions
-
Why is it called Boston Cream Pie if it’s actually a cake?
When the dessert was first created in the 19th century, cakes and pies were often baked in the same round pans. Because of this, the dessert became known as a “pie” even though it has always been made with cake layers. The name remained, and today it’s one of the most famous classic American desserts.
-
Can I make the pastry cream ahead of time?
Yes. Pastry cream can be prepared up to two days in advance. Store it in the refrigerator with plastic wrap pressed directly onto the surface to prevent a skin from forming.
-
Why did my ganache become too thick?
The chocolate-to-cream ratio may have been too high, or the ganache cooled too much before pouring. Simply warm it gently over low heat or stir in a tablespoon of warm cream until it reaches a pourable consistency.
-
Can I freeze Boston Cream Pie?
The assembled cake isn’t ideal for freezing because pastry cream may separate after thawing. However, the individual cake layers freeze beautifully for up to two months before assembly.
Call to Action
If you’ve always admired Boston Cream Pie but thought it looked too difficult to make, I hope this recipe gives you the confidence to try it. Every layer is made with simple ingredients, and once you take it step by step, you’ll discover that this classic dessert is much more approachable than it first appears.
I truly believe homemade desserts have a way of bringing people together. Whether you’re baking for a birthday, family dinner, holiday celebration, or simply because you’re craving something sweet, this cake is guaranteed to impress everyone who takes a bite.
If you make this recipe, I’d love to hear how it turned out. Share your experience, your decorating ideas, or any personal touches you added. Don’t forget to save this recipe, share it with fellow baking enthusiasts, and spread a little homemade sweetness wherever you can.
Bonus: Your Kitchen Notes
One of my favorite parts of baking is seeing how every baker makes a recipe their own. Some people prefer adding espresso to the ganache, while others love decorating the top with chocolate curls or fresh berries. Every small change creates a dessert that’s uniquely personal.
Use this section in your WordPress editor to write down your own notes after baking. Record your baking time, favorite chocolate brand, whether you added extra vanilla, or how long you chilled the cake before serving. Those little observations become incredibly valuable the next time you bake.
The best recipes are more than ingredients and instructions—they become family traditions filled with memories, celebrations, and shared moments around the table. I hope this Homemade Boston Cream Pie becomes one of those treasured desserts in your own kitchen for many years to come.