
Personalized Introduction
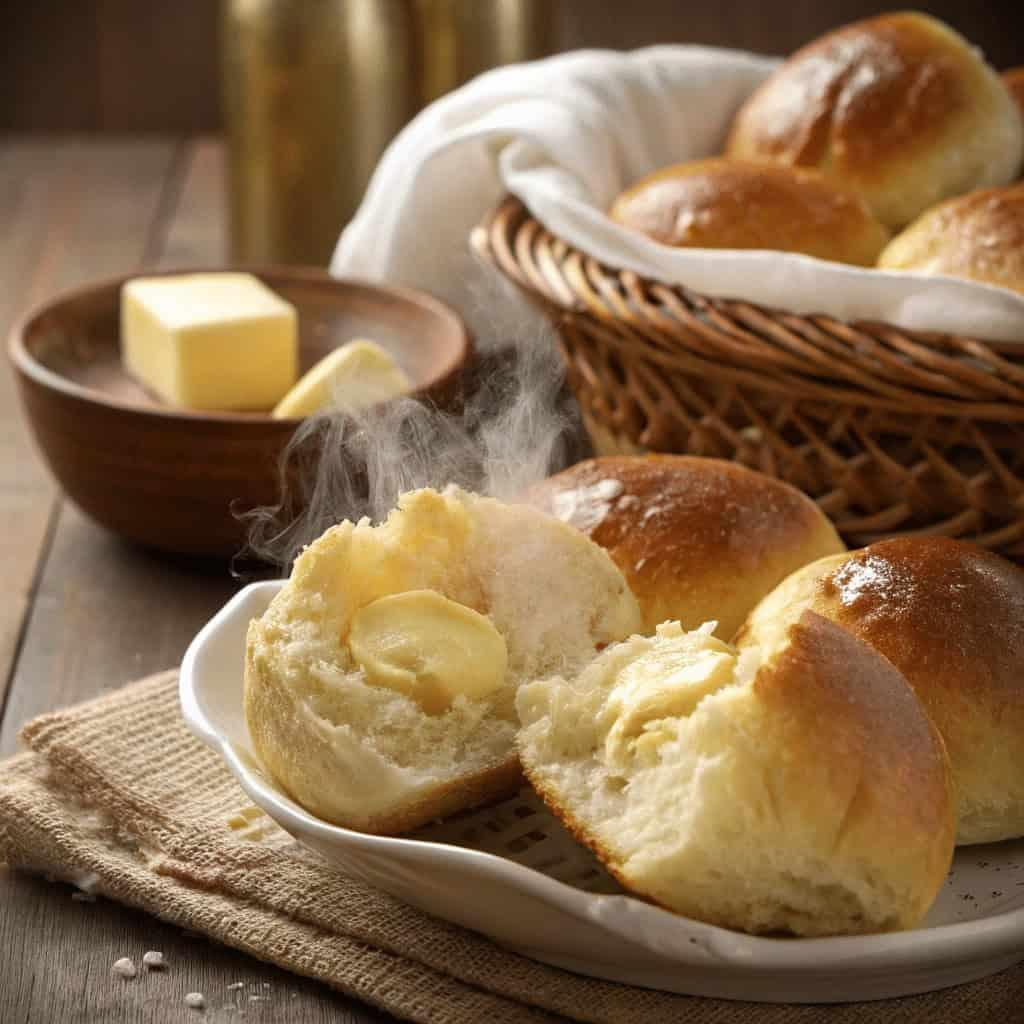
There’s something truly magical about the smell of freshly baked bread filling your home. The warm, buttery aroma drifting from the oven instantly makes the kitchen feel cozy, inviting, and full of love. Whenever I bake these 1-Hour Soft and Buttery Dinner Rolls, that’s exactly the feeling I get. They’re fluffy on the inside, beautifully golden on the outside, and brushed with melted butter while still warm for the perfect finishing touch.
For a long time, I believed homemade bread was something you needed an entire afternoon to make. I imagined hours of kneading, multiple rises, and complicated techniques. Then I discovered that delicious dinner rolls could be made in about an hour without sacrificing softness or flavor. Since then, these quick dinner rolls have become one of my favorite recipes whenever I want homemade bread without the long wait.
The first time I served these rolls with a bowl of creamy soup, everyone at the table reached for a second one before finishing their first. Their soft texture and rich buttery flavor make them impossible to resist. Whether you’re serving holiday dinners, Sunday roasts, weeknight meals, or simply want fresh bread for sandwiches, these rolls always fit the occasion.
One of the things I love most about this recipe is how beginner-friendly it is. Even if you’ve never worked with yeast before, the simple steps make it easy to achieve light, fluffy rolls that look and taste like they came from a neighborhood bakery. Watching the dough rise and transform into golden pillows of bread is incredibly satisfying.
If you’ve been searching for a homemade dinner roll recipe that’s quick, reliable, and wonderfully soft, you’ve found it. Let’s head into the kitchen and bake a batch together—you’ll be amazed at how easy fresh bread can be.
Recipe Origin & Story
Soft dinner rolls have been served alongside family meals for generations. From holiday feasts and Sunday dinners to everyday suppers, freshly baked rolls have long symbolized comfort, generosity, and togetherness. Every culture has its own version of soft bread, but buttery yeast rolls remain one of the most beloved choices around the world.
Traditional dinner rolls often require several hours of rising, making them difficult for busy schedules. Over time, home bakers developed quicker methods using instant yeast and warm ingredients to shorten the process while still creating incredibly fluffy bread. That’s exactly what makes this recipe so special—it delivers bakery-quality results in just about one hour.
In my own kitchen, these rolls have become a regular part of family dinners. They’re especially popular during the holidays because everyone loves pulling apart a warm roll fresh from the baking dish. But honestly, we don’t wait for special occasions anymore. Once you realize homemade rolls can be this quick and easy, it’s hard to go back to store-bought versions.
One of my favorite memories was baking these with my family on a rainy afternoon. We rolled the dough into little balls together, watched them rise, and laughed while brushing them with melted butter straight from the oven. Sometimes the simplest recipes create the warmest memories.
Ingredient Spotlight
- Main Star: Instant yeast is the key to making these rolls so quickly. Unlike active dry yeast, instant yeast can be mixed directly with the dry ingredients and helps the dough rise faster while still creating a wonderfully light texture.
- Secret Boost: Warm milk and melted butter create an incredibly soft crumb while adding rich flavor. Brushing the finished rolls with even more melted butter keeps the tops tender and beautifully shiny.
- Quality Tips: Use fresh instant yeast for the best rise. Warm the milk to about 110°F (43°C)—warm but not hot—to activate the yeast without damaging it. Bread flour gives slightly chewier rolls, while all-purpose flour produces wonderfully soft results.
Nutritional Benefits
These homemade dinner rolls are made with simple pantry ingredients and contain fewer preservatives than many store-bought breads. Milk contributes calcium and protein, while butter provides rich flavor and satisfying texture.
Because you control every ingredient, it’s easy to adjust the recipe to suit your family’s preferences. You can substitute part of the all-purpose flour with whole wheat flour for extra fiber or reduce the sugar slightly if desired.
Fresh homemade bread is also incredibly satisfying, making it easier to enjoy a moderate portion while appreciating every warm, buttery bite.
Adaptable Variations
- Dietary Swaps: Replace dairy milk with unsweetened oat or almond milk and use dairy-free butter for a lactose-free version. Whole wheat flour can replace up to half of the white flour for additional fiber.
- Flavor Twists: Add garlic powder, Italian herbs, shredded cheddar cheese, rosemary, everything bagel seasoning, or grated Parmesan cheese to create delicious flavored rolls.
- Seasonal Spins: During the holidays, brush the rolls with herb butter. In spring, mix fresh chives into the dough. Autumn versions pair beautifully with roasted garlic, while summer rolls taste wonderful served alongside grilled barbecue dishes.
Cooking Science Explained
Yeast feeds on sugar and releases carbon dioxide, creating tiny air pockets throughout the dough. These pockets expand during baking, producing the soft, fluffy texture everyone loves.
Warm milk speeds up yeast activity, helping the dough rise more quickly without sacrificing quality. However, milk that’s too hot can damage the yeast, so keeping the temperature around 110°F is ideal.
Kneading develops gluten, which gives the dough enough strength to trap the gases produced by the yeast. This creates light, airy rolls instead of dense, heavy bread.
Easy, Step-by-Step Recipe
Ingredients
- 3½ cups (440 g) all-purpose flour, plus extra for dusting
- 2¼ teaspoons instant yeast (1 packet)
- ¼ cup granulated sugar
- 1 teaspoon salt
- 1 cup warm milk (110°F / 43°C)
- ¼ cup unsalted butter, melted
- 1 large egg, room temperature
- 2 tablespoons melted butter for brushing after baking
Instructions
- Preheat your oven to 375°F (190°C). Grease a 9×13-inch baking dish or line it with parchment paper.
- In a large mixing bowl, combine the flour, instant yeast, sugar, and salt.
- Add the warm milk, melted butter, and egg. Mix until a shaggy dough forms.
- Knead the dough for about 6–8 minutes until smooth and elastic.
- Cover the dough with a clean kitchen towel and let it rest for about 15 minutes.
- Divide the dough into 12 equal portions and roll each piece into a smooth ball.
- Arrange the dough balls in the prepared baking dish, leaving a little space between each one.
- Cover and allow the rolls to rise for another 15–20 minutes until puffy.
- Bake for 15–18 minutes or until the tops are lightly golden brown.
- Immediately brush the warm rolls generously with melted butter.
- Allow them to cool for 5 minutes before serving warm.
Practical & Valuable Tips
- Storage: Keep leftover rolls in an airtight container at room temperature for up to 3 days or freeze them for up to 3 months.
- Serving Ideas: Serve with soups, stews, roasted chicken, pasta dishes, barbecue, holiday meals, or simply enjoy warm with butter and jam.
- Substitutions: Bread flour creates slightly chewier rolls, while honey may replace the sugar for a richer flavor. You can also use olive oil instead of butter for a different taste.
Make-Ahead & Batch-Cooking
One of the best things about these dinner rolls is that they can easily fit into your schedule. If you want to prepare ahead, shape the rolls and place them in the baking dish, then cover and refrigerate them overnight. The next day, let them sit at room temperature for about 30 minutes before baking. This makes holiday meals and busy weekends much less stressful.
These rolls also freeze beautifully. Once baked and completely cooled, place them in a freezer-safe bag or airtight container. When you’re ready to enjoy them, simply thaw at room temperature and warm in a 300°F oven for about 8 minutes. They’ll taste almost as fresh as the day they were baked.
If you’re feeding a crowd, double the recipe and bake two pans at once. Extra rolls are always appreciated, and leftovers make wonderful sandwich buns for the next day’s lunch.
Eco-Friendly Kitchen Hacks
- Freeze leftover rolls instead of letting them go stale.
- Turn older rolls into homemade breadcrumbs or croutons instead of throwing them away.
- Use reusable silicone baking mats or parchment paper to reduce waste.
- Bake multiple recipes while the oven is hot to save energy.
Pairing Suggestions
- Beverages: Fresh lemonade, iced tea, sparkling water, hot coffee, herbal tea, or hot chocolate all pair beautifully depending on the meal.
- Sides & Spreads: Serve with whipped butter, honey butter, garlic herb butter, strawberry jam, homemade soup, beef stew, chili, roasted turkey, baked ham, or creamy pasta dishes.
Frequently Asked Questions
-
Can I use active dry yeast instead of instant yeast?
Yes. Simply dissolve it in the warm milk with the sugar and let it sit for about 5–10 minutes until foamy before mixing the dough. -
Why didn’t my rolls rise?
The yeast may have expired, or the milk may have been too hot or too cold. Fresh yeast and properly warmed milk make all the difference. -
Can I freeze the dough before baking?
Yes. Shape the rolls, freeze them on a baking sheet, then transfer them to a freezer bag. Thaw overnight in the refrigerator, allow them to rise, and bake as directed. -
How do I keep dinner rolls soft after baking?
Brush them with melted butter immediately after baking and store them in an airtight container once they’ve cooled completely.
Call to Action
If you’ve always wanted to bake homemade bread but thought it would take all day, these 1-Hour Soft and Buttery Dinner Rolls are the perfect place to start. They’re quick, simple, incredibly fluffy, and guaranteed to impress your family and guests alike. Once you taste warm homemade rolls fresh from the oven, you’ll understand why they’re such a timeless favorite.
I hope you enjoy baking these rolls as much as I do. If you give this recipe a try, I’d love to hear how they turned out! Leave a comment below, share your favorite variations, and let me know what meal you served them with. Don’t forget to save this recipe for holidays, family dinners, and cozy weekends, and be sure to tag us on social media if you share your beautiful homemade rolls. Happy baking!
Bonus: Your Kitchen Notes
Every baker develops little tricks that make a recipe uniquely their own, and these dinner rolls are no exception. Use this space to record your favorite flour blend, rising times, toppings, or flavor additions. Maybe your family loved garlic herb butter brushed over the warm rolls, or perhaps shredded cheddar cheese became your new favorite variation.
You can also note oven temperatures, baking times, or serving ideas that worked especially well. Over time, these simple notes will help you create your own signature version of this recipe and turn every batch into a memorable family tradition. Happy baking, and enjoy every warm, buttery bite!