Personalized Introduction
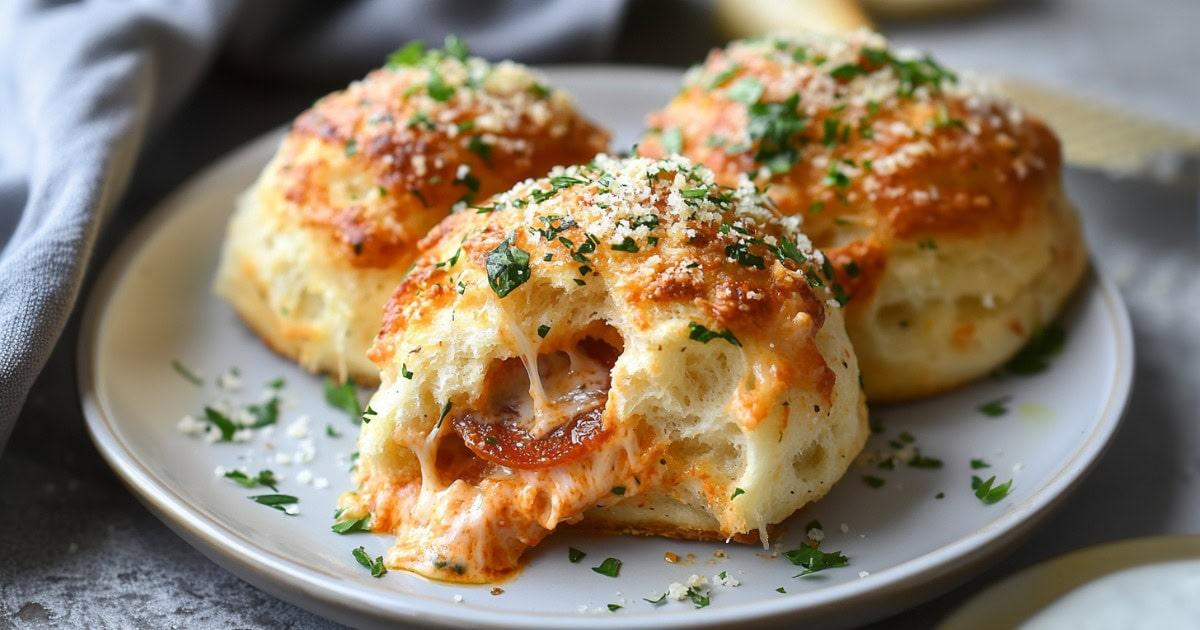
Have you ever had one of those days when you’re craving pizza but don’t feel like making an entire pizza from scratch? That’s exactly how I discovered these Cheesy Pizza Bombs. They’re everything I love about pizza wrapped into a warm, bite-sized package that’s perfect for sharing—or keeping all to yourself!
The first time I made these little pizza bombs, I was preparing snacks for a movie night. I wanted something quick, cheesy, and fun to eat without needing plates and forks. As soon as they came out of the oven, golden brown and smelling like a pizzeria, everyone gathered around the kitchen. Before I knew it, the tray was empty.
Since then, these pizza bombs have become one of my favorite go-to recipes. They’re simple enough for beginners, quick enough for busy weeknights, and delicious enough to impress family and friends. If you’re a pizza lover, you’re about to discover a new favorite snack.
Recipe Origin & Story
Pizza bombs are inspired by classic Italian pizza flavors but reimagined into a portable, snack-sized form. While traditional pizza has been enjoyed for centuries, modern home cooks began experimenting with stuffed dough recipes to create easier appetizers and party foods.
The beauty of pizza bombs is that they capture all the best parts of pizza—the melty cheese, savory sauce, and flavorful toppings—inside a soft, golden crust. They quickly became popular at gatherings because they’re easy to make and even easier to eat.
For me, this recipe brings back memories of family movie nights, casual weekend gatherings, and those moments when everyone reaches for “just one more” until the entire tray is gone.
Ingredient Spotlight
- Main Star: Mozzarella cheese is the heart of every pizza bomb, creating that irresistible stretchy cheese pull everyone loves.
- Secret Boost: A spoonful of pizza sauce tucked inside each bomb keeps the filling flavorful and authentic.
- Quality Tips: Choose low-moisture mozzarella and thick pizza sauce to prevent the filling from becoming watery during baking.
Nutritional Benefits
Mozzarella cheese provides protein and calcium, making these snacks more satisfying than many packaged appetizers.
Tomato-based pizza sauce contains lycopene, a naturally occurring antioxidant found in cooked tomatoes.
Adding vegetables like peppers, spinach, or mushrooms can increase the fiber and nutrient content while adding extra flavor.
Adaptable Variations
- Dietary Swaps: Use gluten-free dough and dairy-free cheese alternatives for special dietary needs.
- Flavor Twists: Add cooked sausage, bacon bits, jalapeños, olives, mushrooms, or even a sprinkle of red pepper flakes.
- Seasonal Spins: Fresh basil and tomatoes work beautifully in summer, while extra cheese and hearty meats create a cozy winter version.
Cooking Science Explained
As the dough bakes, moisture inside turns to steam, helping create a soft and fluffy texture while the exterior becomes golden and crisp.
Mozzarella melts evenly because of its balanced moisture and fat content, creating the gooey center that makes pizza bombs so satisfying.
Brushing the tops with seasoned butter not only adds flavor but also encourages beautiful browning during baking.
Easy, Step-by-Step Recipe
Ingredients
- 1 can refrigerated biscuit dough (8 biscuits)
- 1 cup (115g) shredded mozzarella cheese
- ¼ cup pizza sauce
- 20–24 pepperoni slices
- 1 tablespoon grated Parmesan cheese
- 2 tablespoons melted butter
- 1 teaspoon garlic powder
- 1 teaspoon Italian seasoning
- ½ teaspoon dried oregano
- Optional: red pepper flakes
- Optional: fresh parsley for garnish
- Extra pizza sauce for dipping
Instructions
- Preheat your oven to 375°F (190°C) and line a baking sheet with parchment paper.
- Separate the biscuit dough and flatten each piece into a small circle using your hands.
- Place about 1 teaspoon of pizza sauce in the center of each dough round.
- Add a tablespoon of mozzarella cheese and 2–3 pepperoni slices.
- Carefully gather the edges of the dough and pinch them together tightly to seal the filling inside.
- Place each dough ball seam-side down on the prepared baking sheet.
- Mix melted butter, garlic powder, Italian seasoning, and oregano in a small bowl.
- Brush the tops generously with the seasoned butter mixture.
- Bake for 12–15 minutes, or until the pizza bombs are golden brown and fully cooked.
- Remove from the oven, sprinkle with Parmesan cheese and parsley, and serve warm with extra pizza sauce.
Practical & Valuable Tips
- Storage: Store leftovers in an airtight container in the refrigerator for up to 3 days.
- Serving Ideas: Pair with marinara sauce, ranch dressing, garlic butter, or spicy pizza dip.
- Substitutions: Replace pepperoni with cooked chicken, sausage, vegetables, or turkey pepperoni.
Make-Ahead & Batch-Cooking
One of my favorite things about this recipe is how easy it is to prepare ahead. You can assemble the pizza bombs several hours before baking and keep them refrigerated until you’re ready to cook.
They’re also freezer-friendly. Freeze the assembled bombs on a tray, then transfer them to a freezer bag. When you’re ready to enjoy them, bake directly from frozen, adding a few extra minutes to the cooking time.
This makes them perfect for meal prep, parties, and unexpected guests.
Eco-Friendly Kitchen Hacks
- Use leftover pizza toppings instead of purchasing new ingredients.
- Bake multiple trays at once to reduce overall energy use.
- Store leftovers in reusable containers instead of disposable bags.
- Turn leftover pizza bombs into next-day lunches instead of throwing them away.
Pairing Suggestions
- Beverages: Sparkling water, lemonade, iced tea, soda, or fruit-infused water all pair beautifully with these cheesy snacks.
- Sides & Sauces: Caesar salad, garlic breadsticks, marinara sauce, ranch dressing, or roasted vegetables.
Frequently Asked Questions
-
Can I use homemade pizza dough?
Absolutely! Homemade pizza dough works wonderfully and adds an even more authentic pizza flavor. -
Why did my filling leak out?
Usually, the dough wasn’t sealed tightly enough. Be sure to pinch all seams securely before baking. -
Can I make these in an air fryer?
Yes! Air fry at 350°F (175°C) for about 8–10 minutes until golden brown. -
Can I make vegetarian pizza bombs?
Definitely. Replace the pepperoni with mushrooms, peppers, olives, onions, spinach, or your favorite vegetables.
Call to Action
I hope you’ll give these Cheesy Pizza Bombs a try. They’re quick, cheesy, comforting, and perfect for everything from family movie nights to party appetizers.
If you make them, I’d love to hear how you customized your filling. Did you go classic pepperoni, load them with vegetables, or create a spicy version? Share your experience and inspire fellow pizza lovers.
Bonus: Your Kitchen Notes
Use this space to jot down your favorite combinations, dipping sauces, and personal tweaks. Maybe you’ll discover the ultimate pizza bomb variation that becomes a family tradition.
The best recipes are the ones that evolve with every batch, and these cheesy pizza bombs are the perfect recipe to make uniquely your own.